MCTS to MCITP , 70-351 , 70-089 , 70-236 , 70-640 , 70-642 , 70-646 , 70-630 , 70-285 , 83-640: 2010

Monday, December 27, 2010

Job opening at Matrix Systems (Pvt.) Ltd.


Matrix Systems (Pvt) Limited, an ISO 9001:2008 certified and CMMI Level-II appraised company, is an offshore solution provider for the asset management industry worldwide. Operating as an adjunct company to SoftPak Financial Systems (www.softpak.com) for more than a decade, Matrix Systems has established herself as a leader in the realm of software development and consultancy.

To support our expansion plans, we look forward to acquire services of careerist individuals with an eye for detail and enthusiasm to excel.

SENIOR SOFTWARE ENGINEER (JOB CODE: C++)
Masters/ Bachelors degree in Computer Science or relevant field with 2-4 years experience of developing software using C++. Experience of MFC and Linux will be a considerable advantage. The successful candidate should have in-depth knowledge of client-server and multithreaded software architecture, SQL Server 2000/2005 and Oracle 9i/10G. Good problem solving, collaboration and English communication skills will be a definite plus.

SOFTWARE ENGINEER (JOB CODE: C#)
Masters or Bachelors degree in Computer Science or relevant field with 1-2 years experience of developing software using C#. Experience of technologies like WPF, Microsoft Composite Application Block (CAB), Infragistics tools or Microsoft Enterprise Library will be a considerable advantage. The successful candidate should have in-depth knowledge of Design Patterns and multithreaded software architectures; should be well-versed in SQL Server and Oracle databases.

SOFTWARE ENGINEER (JOB CODE: JAVA)
Masters / Bachelors degree in computer science or relevant field with 1-3 years experience of developing software in Java SE and EE.  In-depth knowledge of spring, Hibernate, EJB, Ajax, Flex and other Java enterprise / Web technologies and frameworks is essential. Intermediate to expert level knowledge of Oracle, Database development  and developing software under Linux environment will be preferred. Awareness of Project Management practices as per CMMI, PMI and ISO 9001 will be a considerable advantage. Fresh graduates with excellent knowledge of java and good academic record are also encouraged to apply.

SENIOR SQA ENGINEER / SQA ENGINEER (JOB CODE: SSQAE / SQAE)
Masters/ Bachelors degree in Computer Science or relevant field with 3-5 years experience for 2 senior positions and 1-2 years experience for 3 junior positions having understanding of planning  and execution of testing and QA cycles in Software Quality Assurance department. Incumbent shall be well versed in SQL Server 2000/2005 and Oracle 9i/10G. Experience of test automation, formal technical reviews will be a definite plus. Fresh graduates are also encouraged to apply.

SENIOR SOFTWARE PROCESS ENGINEER (JOB CODE: SPI)
Masters/ Bachelors degree in Computer Science or relevant field with 2-4 years experience of designing and implementing processes as per CMMI, ISO 9001 and ISO 27001 frameworks. The incumbent should have working knowledge of different SDLC phases and sound understanding of software development, quality assurance, project management, process documentation, quality & security audits and process consultancy in accordance to aforementioned international standards. Excellent written/verbal communication and interpersonal skills with familiarity of process automation tools will be highly preferred.

RECRUITEMENT OFFICER (JOB CODE: RECRUITER)
Masters/ Bachelors degree in HR or relevent field with 2+ years of experience in handling large volume recruitment and impeccable verbal / written communication & interpersonal skills in English. The incumbent will be responsible for using global online career / employment solutions to find, interview and recommend USA based candidates matching recruitment needs of our clients. Extraordinary negotiations and decision making skills, updated professional knowledge of recruiting best practices and internet based recruitment products/services & trends will be highly preferred.

UNIX SYSTEM ADMINISTRATOR (JOB CODE: UNX-ADMIN)
Bachelors or Masters Degree in Computer Engineering / Science with 5+ years experience in a large networking environment with extensive exposure to Shell programming, Storage and SAN. The incumbent shall help manage, maintain and deploy servers in a mixed environment of Solaris, Linux, VMWare, AIX and Windows running infrastructure and trading applications. Must have expert level skills and experience in Solaris, Linux, Veritas Storage Foundation and VCS. Middleware, VMWare, Windows, AIX experience shall be a definite plus. Good verbal / written communication and interpersonal skills in English is imperative as job involves dealing with foreign clients.

WINDOWS ADMINISTRATOR (JOB CODE: WIN-ADMIN)
Masters/ Bachelors degree in Computer Science or relevant field with 4+ years experience in system administration of Windows Active Directory 2003. Candidate should have sound understanding and experience of designing, administrating and troubleshooting Windows Active Directory with its services including Kerberos & LDAP and GPO configuration in a multi-domain forest. Good DNS / DHCP knowledge and relevant Microsoft Certifications will be a definite plus.

TECHNICAL WRITER (JOB CODE: TW)
Masters/ Bachelors degree in Computer Science/ Communication  or relevant field with 2+ years experience of developing end-to-end SDLC (Software Development Life Cycle) and process documentation with proven command over English language and technical writing maxims.

We offer an excellent working environment, highly competitive financial packages including salaries, bonuses, other benefits and career growth towards leading positions in the organization. Apply latest by December 31, 2010 by sending your latest resume along with a covering letter to jobs@softpak.com. Please specify "Job Code" in the subject line.


Matrix Systems is an equal opportunity employer.

Note : On Behalf of Matrix Systems (Pvt.) Ltd.

Wednesday, December 22, 2010

Unix Administrator for Matrix Systems

An execllent oppurtunity .
Apply with Confidence.

Unix Administrator :


HR Recruiter :


Thanks,
Himayat Ullah Khan,
Network Engineer,
Karachi,
Pakistan.

Monday, December 13, 2010

How to Uninstall ISASTGCTRL Service

Hi Folks,

Today i have a problem with installing ISA 2006 which was corrupted during Install.
Next Time i ran Setup its gives me an Error " Cannot Install Configuration Managment Server as the Port is in Use by Another Application"
I checked Add/Remove Programs and found the ISASTGCTRL Services was not correctly installed. We cannot Uninstall the Service as there is no link to remove the From Add/Remove.
So, I worked around for a while and found this tool that allows us to remove the file causing HeadAche to me for such a long time.
Look for ADAM Folder in C:\Windows or just type the following Command at the Command Prompt.

"C:\WINDOWS\ADAM\adamuninstall.exe" /i:ISASTGCTRL

This will uninstall the Service.
Also Unistall the Active Directory Service from Add/Remove Programs.
 Restart your Computer and WOW next time you run the Setup it all goes Fine.

Have a nice Day.

Cheers,

Himayat Ullah Khan,
MCITP Server Administrator,
MCTS ISA 2006,
CCNA,

Friday, December 10, 2010

How to Fix Desktop Wallpaper Issue in Windows 7

How to Fix Desktop Wallpaper Issue in Windows 7 using Windows Server 2008 as a Domain Controller.


Hi Folks,

Today i had a Problem with my Wallpaper in Windows 7 which was showing me a black screen instead of the Desktop Wallpaper i applied
through Group Policy in Windows Server 2008.I worked Around to solve this issue and came to a conclusion that enables me to solve the issue.
So, I decided to share this on my own Blog for Viewers.

This Error occurs every now and then  almost to everyone using Windows 7 as Client and Windows Server 2008 as a Domain Controller.

Microsoft has verified this and released a Fix for both 64 bit and 32 bit Operating Systems.

Download the Fix and Apply to the Affected Systems.

Steps to Follow :

1. Download the Fix.
2. Copy to Affected System.
3. Extract to a Folder.
4. Run the Setup

After the Fix is applied restart your computer and you will have your problem resolved.

Hope this solves your issue.

Thanks,

Himayat Ullah Khan,

Network Engineer,

Pakistan.

Friday, October 15, 2010

Applying Disk Quota for Domain Users , Windows 2003

About Disk Quotas
Earlier in Windows NT Administrators were unable to apply Disk Quotas to users as this feature was not available, but with the introduction of Windows 2000 their comes the induction of Disk Quota Management through Group Policy easing the life of System Administrators.The Only Problem left was this has not much features that Admins can use with Scripting,Reporting and Remote Usage. Windows 2003 has all the features like reporting,managing and remote usage of Disk Quota.

Disk Quota can only be Implemented with System Running with NTFS partitions. FAT/FAT32 are not supported.Disk quota are configured on Volume basis so one need to configure Separate Volumes.
This was some how introduction to Disk Quota, now let start how to configure this on Windows 2003 Server.

Setting Up Group Policy
The most practical means of configuring disk quotas on a large scale would be through a domain-level group policy. This will configure the settings automatically on any of the volumes you wish to have disk quotas enabled, saving you the need to have to configure each volume independently.
Open Group Policy Management Console(Enter gpedit.msc at Run), Navigate to Computer Configuration > Administrative Templates > System > Disk Quotas. On the right hand pane you will see a list of policies that can be applied. Double click the “Default Quota Limit and Warning Level Properties” setting.


Figure 1. The Default Quota Limit and Warning Level Properties Dialog

Default Value was 100 MB, I changed this to 10 MB.You can set what ever value suits your organization needs.You can apply further setting you need to aply on users.
You may also want to manually force a group policy update using the gpupdate utility. Simply go to Start > Run and type "gpupdate /force" followed by the return key. This will refresh both the computer and user policies


Configuring Disk Quota and Disk Quota Enteries
Using the Computer Management console, you can configure disk quotas for a local or remote volume from a central location. To open Computer Management, you have three choices; either right click My Computer and select Manage, type compmgmt.msc in the Run bar or select Computer Management from the Administrative Tools folder.
Select which computer you wish to manage from the root node. To select a remote machine right click the “Computer Management” node, select “Connect to another computer…” and choose the computer you wish to manage. Now, navigate to Storage > Disk Management and select the volume you want to configure from the right hand pane and open the properties dialog. Click the Quota tab and enable the options you want to be enforced.


Figure 2. Disk Quota Dialog Box

Click Quota Entries and Furhter Add Domain Users to apply Disk Quota Entries.Navigate to “Quota” and Click “New Quota Entry”.


Figure 3: Adding a new User Quota Entry
Enter Disk Space you need to apply for a particular user


Figure 4: Adding a new quota entry

Press “OK” and enter.Disk Quota applied to a Particular User.


Figure 5: Viewing a list of Quota Entries

This article has given you an overview of Disk Quotas in Windows 2003. We’ve looked at why they would be used and how to configure them.


Enhanced by Zemanta

Monday, October 11, 2010

MCITP Track Information ( For Starters and Professionals )


Dear Folks,

As you all know new Products and Technologies are touching the IT Market

Day by day.Microsoft Being the Most Advance Organization that gives

Training and Support for its Products all over the world and having the

Cheapest Certificaion Rates.I fortunately been a part of Some Micrsoft Products

Like Server 2008,Server 2003,ISA Server 2006,Windows 7,Windows XP and others.

Reason for Writing this matter is to Provide Knowledge to People about some of

Microsoft Technology Tracks as well as Professional Tracks.

Many of You People Asks me about Different Tracks,Paper Codes and Study Material.

So, I decided to Upload Some of the Most Popular Tracks with their Paper Codes on my Blog.


Server 2008 Administration Track :


MCTS ( Windows Server 2008 Active Directory, Configuring ) 70-640
MCTS ( Windows Server 2008 Network Infrastructure, Configuring ) 70-642
MCITP ( Windows Server 2008, Server Administrator ) 70-646

This Track will earn you MCITP Server Admin Certification but this is not the End of Track.
There is one more Certification Track which Leads you to be an "EnterPrise Administrator".

MCTS ( Windows Server 2008 Applications, Configuring ) 70-643
MCITP ( Windows Server 2008, Enterprise Administrator ) 70-647

ISA Server 2006 has only one Certification i.e :

MCTS ( Microsoft Internet Security and Acceleration Server 2006, Configuring ) 70-351


Microsoft Exchange 2007 :


MCTS ( Exchange Server 2007, Configuring ) 70-236
MCITP ( Designing Messaging Solutions with Microsoft Exchange Server 2007 ) 70-237
MCITP ( Deploying Messaging Solutions with Microsoft Exchange Server 2007 ) 70-238

Windows 7 :


MCTS ( Windows 7, Configuring ) 70-680
MCITP ( Upgrading to Windows 7 MCITP Enterprise Desktop Support Technician ) 70-682


These are Some of the Certification Tracks that you might require for you Professional Career Growth.

Hope this Works fine for you.

Thanks,

Himayat Ullah Khan,
MCITP ( Server Admin )
MCTS ( ISA 2006 )
CCNA ( R & S )

Give us your FeedBack . 
Email Us : hiukhan@gmail.comhttp://officems.blogspot.comhttp://officems.blogspot.com/

Thursday, September 9, 2010

Restrict User Desktop to Company Default WallPaper ;


In an IT based environment people used to change their Desktop WallPaper Day by Day which isn’t looks like Professionals. So, CEO of the Company Ask you to Deploy a Company’s Default WallPaper whenever user logon to the System. This can be Accomplished by Apply a Windows Server Group Policy Feature which enables IT Administrator to fullfil the Task Quite Simple and more Easily. This User Based Group Policy deploys default page which you apply whenever user logon . And Because this policy is applied to User Configuration so from where ever user logon to Domain from Any Computer he will get the Default WallPaper Set by You. Group Policy can be applied to a specified Organization Unit (OU) and even to the Entire Domain but its better to Apply as per OU.
This Step by Step Configuration will guide you to Deploy the Policy more Easily.
Open Active Directory Users and Computers and Navigate to the OU on which you want to apply the Group Policy.


Right Click on OU and click Properties ( In my Case it is the Test OU )


Move to the Group Policy Tab and Click on “New” to create a new Group Policy and Give it a Name so that you can remember it while using or apply to another OU. This Group will be different from your Default Group Policy. You can also Block the Default Group Policy if you don’t want to Apply. See in the Below Image you will see at the Bottom “ Block Policy Inheritance “. Check Mark if you want to Block but in this Case it is not required so we move ahead Making a New Policy.


Now Double Click on the Policy ( Desktop ) and navigate to User Configuration à Administrative Templates à Desktop à Active Desktop.


Double Click “Active Desktop WallPaper” and Click Enable to apply. Also specify the Path where the Default Image is located. You can Also Set the Wallpaper Style Whether Stretch,Center or Tile.


Click Apply and Close all Boxes.
Goto Run and Type
gpupdate /force
This was the Image I used as a Default Wallpaper.


Verification :
Now logon to a client Computer Using the User of the Organization Unit and See if the Policy has applied successfully or not. In my case I have a “Test User” so I logged in through “Test”.


Wow, That was Easy J
Also Check is the user Restricted to change to Default Wallpaper.


OpenDisplay Properties” , Goto Desktop and check thatBrowseButton is Disabled.


This ends the Article on “ Restricting User’s Desktop WallPaper

Note:-

Do not make the User a Member of Local System Administrator Group, the Key to Success is to give User previliges as less as possible.
User Should Always be a Part of Power User Group . This way user will not be able to do any registry changes to Enable his/her Desktop Again.

Thanks,
Himayat Ullah Khan.
CCNA,MCTS,MCP


Friday, August 27, 2010

70-640 Paper material , 70 640 Exam

As you know Dumps are changed from Time to Time so i try to upload the latest dumps at my earliest as soon as i get them.
These are the Latest Dumps for 70-640 Exam Paper.
But Again please Read the Book Thoroughly before entering into Exam as no one know when the paper is going to be changed. And most importantly if you dont know how to use the Server 2008 Active Directory Implementation and configuration then its useless to just paste the logo on your CV.

Click Here to Download

Wish you people best of Luck for Your Future.

Himayat Ullah Khan,

Wednesday, August 18, 2010

How to Resize VMware Disk


How to Resize VMware Disk 

This Post Helps you Resize VMware Disk Size Using VMware Convertor.

Click Here to Download VMware Convertor.

Follow the Step By Step Article for Converting.

a) Turn Off the Virtual Machine.

b) Open VMware Convertor Application.


Open the Convert Machine Wizard and Select Virtual Machine file as the Source.(File containing Disk which we need to resize).
Click Next

Select Standalone Virtual Machine as the Destination.
Please Remember the Virtual Machine Details because here the Converted and Resized Drive will be Created. In the Below Scenario the Name of the Folder  will be “Windows Server 2003 Enterprise Edition” and the directory will be “D:\VM\Server”.
The Exact Path of the file will look like this “D:\VM\Server\ Windows Server 2003 Enterprise Edition”
Click Next

View the Properties and Edit as per Requirement.
Its Upto you if you want to install VMware Tools. Vmware Tools makes a Virtual Machine to Run Faster.
In this Case Click Edit opposite to “Data to Copy”, Perform the Task as in the Below SnapShot.
Click Next

View the System Information and Click Finish

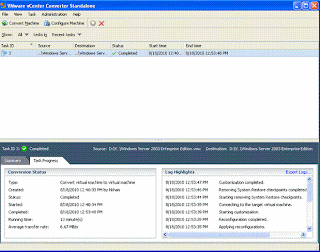
Check the Status which will be “Running” for a While and after sometime it will start to Perform the Resize.
After Successful Completion of the Resize the Following window will appear if every thing goes fine.

Verification :
Path to VMware Disk will be that you specified in the Destination Folder.
(In my Case it was D:\VM\Server)
The Highlighted Folder is what we have created through VMware Convertor.
Open the Newly Created Partition with VMware .
Power On this Virtual Machine and Check the Size ( I set the new Size to 20 GB ).


Cheers,

Himayat Ullah Khan.


Enhanced by Zemanta