How to Resize VMware Disk
This Post Helps you Resize VMware Disk Size Using VMware Convertor.
Click Here to Download VMware Convertor.
Follow the Step By Step Article for Converting.
a) Turn Off the Virtual Machine.
b) Open VMware Convertor Application.
Open the Convert Machine
Wizard and Select Virtual Machine file as the Source.(File containing Disk
which we need to resize).
Click Next
Select Standalone Virtual
Machine as the Destination.
Please Remember the Virtual
Machine Details because here the Converted and Resized Drive will be Created.
In the Below Scenario the Name of the Folder will be “Windows Server 2003 Enterprise
Edition” and the directory will be “D:\VM\Server”.
The Exact Path of the file
will look like this “D:\VM\Server\ Windows Server 2003 Enterprise Edition”
Click Next
View the Properties and Edit
as per Requirement.
Its Upto you if you want to
install VMware Tools. Vmware Tools makes a Virtual Machine to Run Faster.
In this Case Click Edit opposite to “Data to Copy”, Perform the Task as in the Below SnapShot.Click Next
Check the Status which will
be “Running” for a While and after sometime it will start to Perform the
Resize.
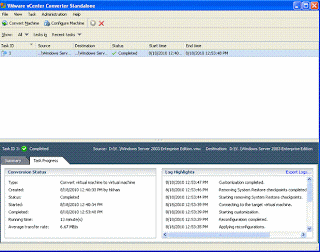
After Successful Completion of the Resize the Following window will appear if every thing goes fine.
After Successful Completion of the Resize the Following window will appear if every thing goes fine.
Verification :
Path to VMware Disk will be that you specified in the
Destination Folder.
(In my Case it was D:\VM\Server)
The Highlighted Folder is what we have created through
VMware Convertor.
Open the Newly Created Partition with VMware .
Power On this Virtual Machine and Check the Size ( I set the new Size to 20 GB ).
Power On this Virtual Machine and Check the Size ( I set the new Size to 20 GB ).


No comments:
Post a Comment
Use full comments are highly appreciable.
Please do not post irrelevant Messages.
Thanks.
Note: Only a member of this blog may post a comment.