About Disk Quotas
Earlier in Windows NT Administrators were unable to apply Disk Quotas to users as this feature was not available, but with the introduction of Windows 2000 their comes the induction of Disk Quota Management through Group Policy easing the life of System Administrators.The Only Problem left was this has not much features that Admins can use with Scripting,Reporting and Remote Usage. Windows 2003 has all the features like reporting,managing and remote usage of Disk Quota.
Disk Quota can only be Implemented with System Running with NTFS partitions. FAT/FAT32 are not supported.Disk quota are configured on Volume basis so one need to configure Separate Volumes.
This was some how introduction to Disk Quota, now let start how to configure this on Windows 2003 Server.
Setting Up Group Policy
The most practical means of configuring disk quotas on a large scale would be through a domain-level group policy. This will configure the settings automatically on any of the volumes you wish to have disk quotas enabled, saving you the need to have to configure each volume independently.
Open Group Policy Management Console(Enter gpedit.msc at Run), Navigate to Computer Configuration > Administrative Templates > System > Disk Quotas. On the right hand pane you will see a list of policies that can be applied. Double click the “Default Quota Limit and Warning Level Properties” setting.
Figure 1. The Default
Quota Limit and Warning Level Properties Dialog
Default Value
was 100 MB, I changed this to 10 MB.You can set what ever value suits your
organization needs.You can apply further setting you need to aply on users.
You may also want to manually force a group policy update using
the gpupdate utility. Simply go to Start > Run and type "gpupdate /force" followed
by the return key. This will refresh both the computer and user policies
Configuring Disk Quota and Disk Quota Enteries
Using the Computer Management
console, you can configure disk quotas for a local or remote volume from a
central location. To open Computer Management, you have three choices; either
right click My Computer and select Manage, type compmgmt.msc in the Run bar or
select Computer Management from the Administrative Tools folder.
Select which computer you wish
to manage from the root node. To select a remote machine right click the
“Computer Management” node, select “Connect to another computer…” and choose
the computer you wish to manage. Now, navigate to Storage > Disk Management
and select the volume you want to configure from the right hand pane and open
the properties dialog. Click the Quota tab and enable the options you want to
be enforced.
Figure 2. Disk Quota Dialog Box
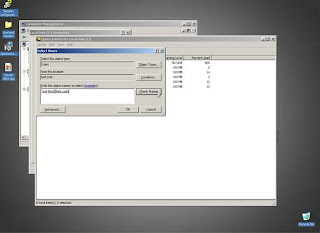
Click Quota Entries and Furhter Add Domain Users to apply Disk
Quota Entries.Navigate to “Quota” and Click “New Quota Entry”.
Figure 3: Adding a new User Quota Entry
Enter Disk Space you
need to apply for a particular user
Figure 4: Adding a new quota entry
Press “OK” and enter.Disk Quota applied to a Particular User.
Figure 5: Viewing a list of Quota Entries
This article has given you an overview of Disk Quotas in Windows
2003. We’ve looked at why they would be used and how to configure them.


No comments:
Post a Comment
Use full comments are highly appreciable.
Please do not post irrelevant Messages.
Thanks.
Note: Only a member of this blog may post a comment.